
How to Add Color Swatches to Your WooCommerce Store
Last updated: August 2026
This walks through the video above step by step. The result: clickable color swatches on your WooCommerce product pages, right inside your Swiffle Grid — no code required.
Step 1 — Create the Color attribute
Go to Products → Attributes in your WordPress admin. Create a new attribute named « Color », then check the « Base color? » box to enable color swatches for this attribute.
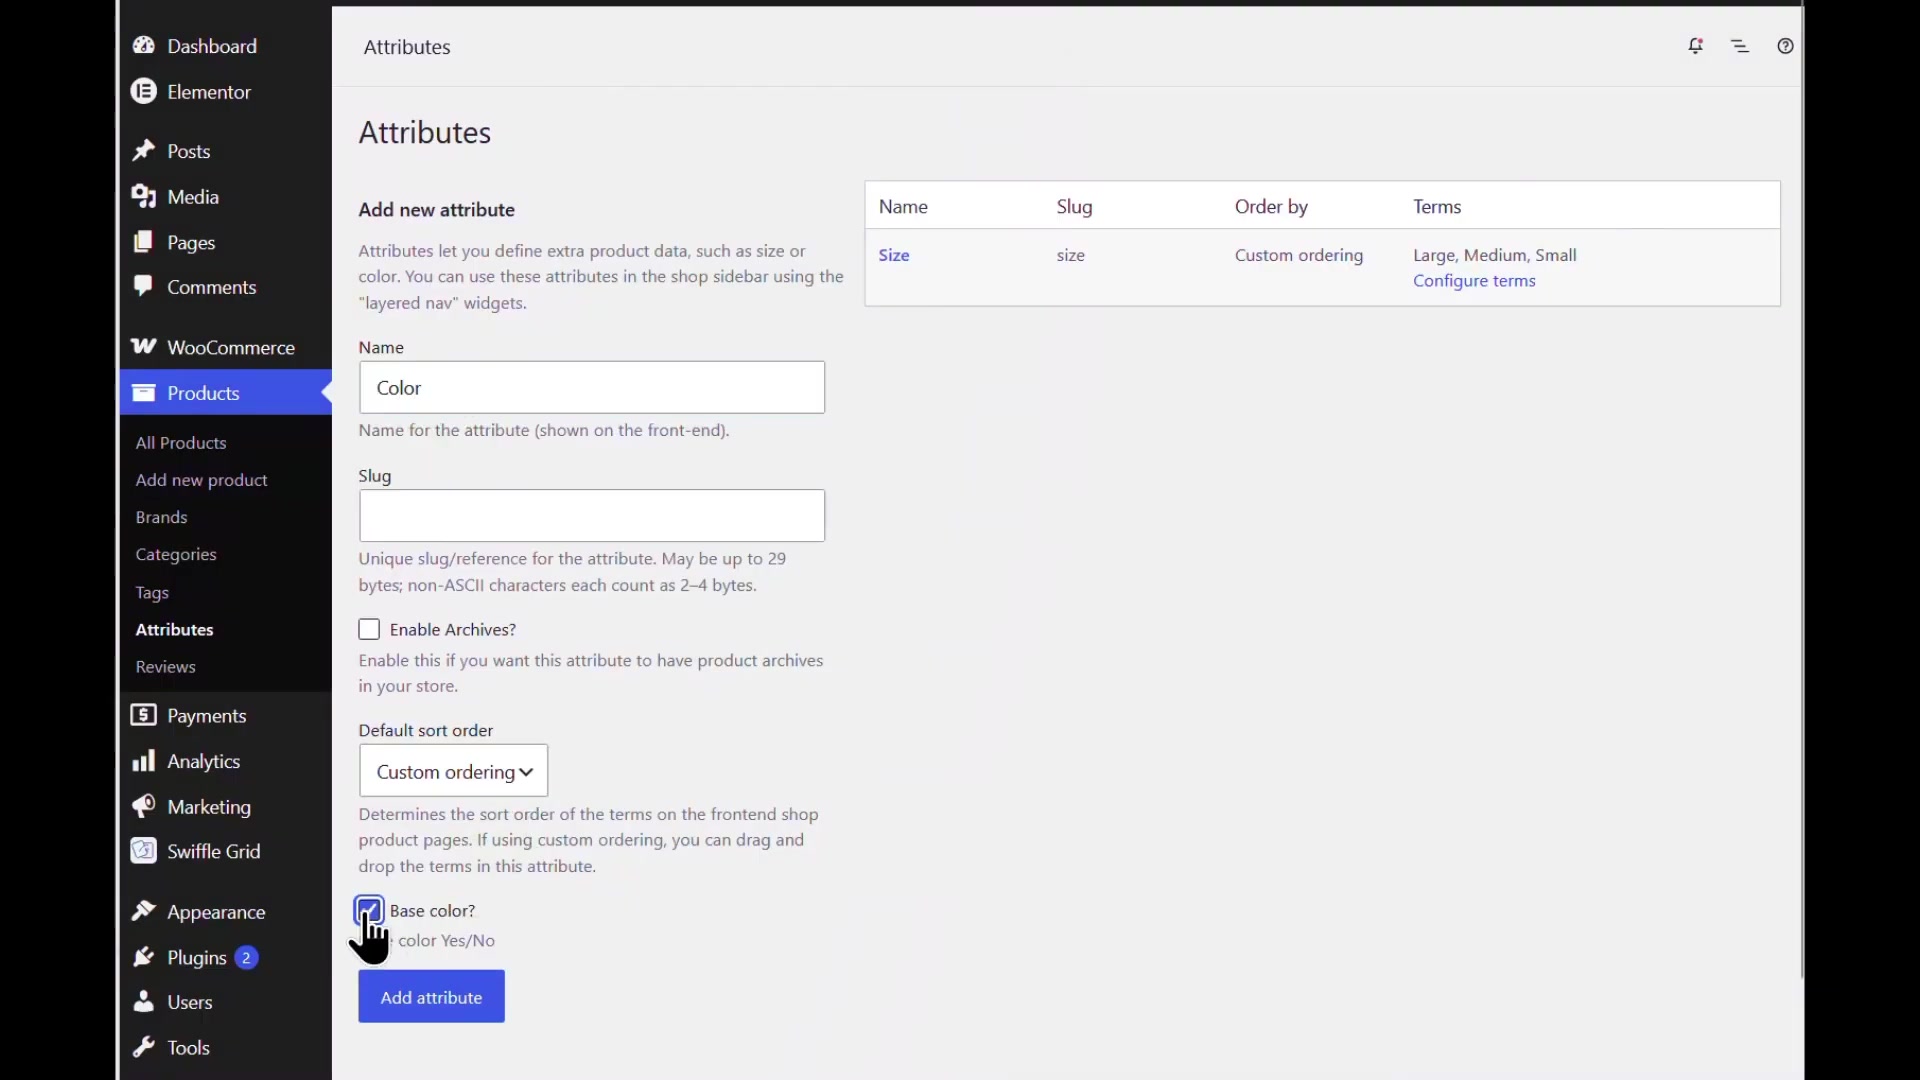
The « Color » attribute, with « Base color? » checked.
ℹ️ The « Base color? » checkbox is what tells Swiffle Grid to render this attribute as clickable color swatches, instead of a plain dropdown list.
Step 2 — Add a term and pick its color
Click « Configure terms » for your new attribute, then create your first term (for example « Blue »). Use the color picker to set its base color.
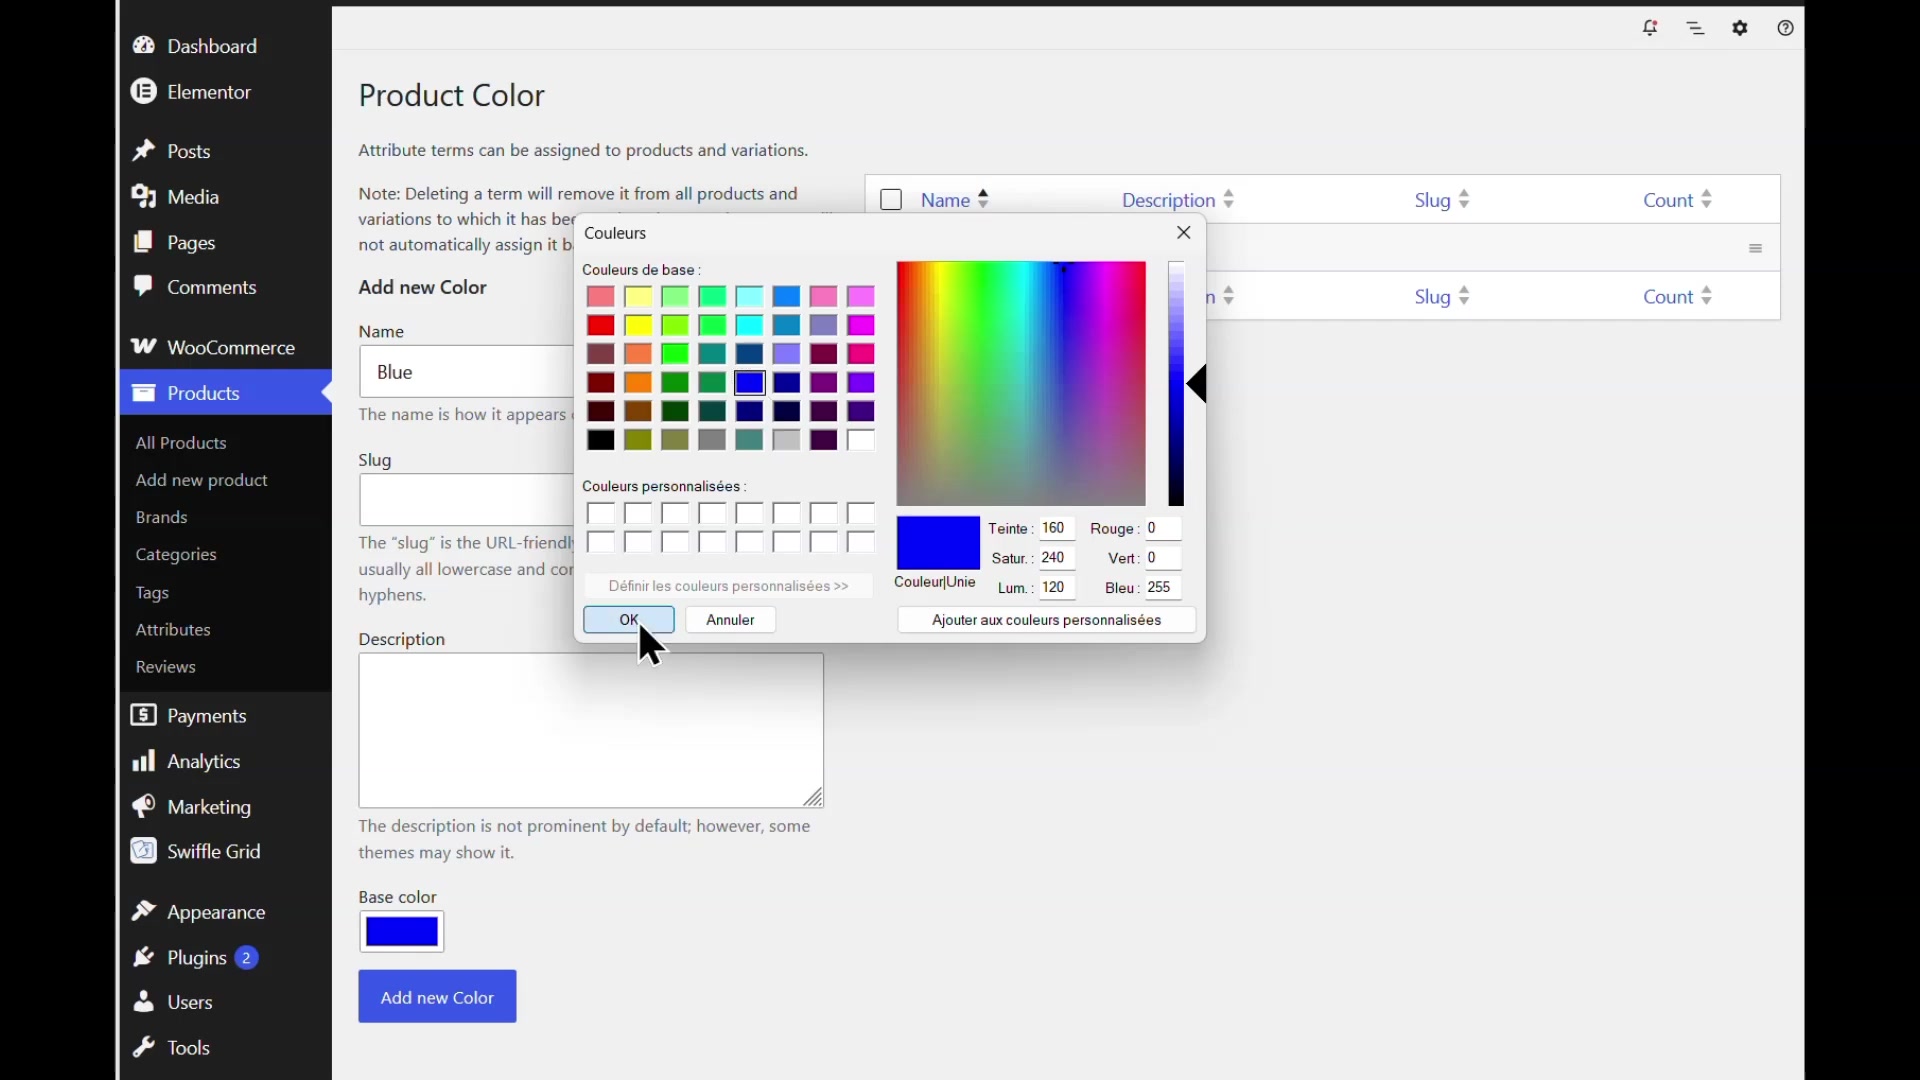
Picking the base color for the « Blue » term.
Step 3 — Repeat for every color
Repeat the process for every color you want to offer on your products. Here, a second term, « Red », is created with its own base color.
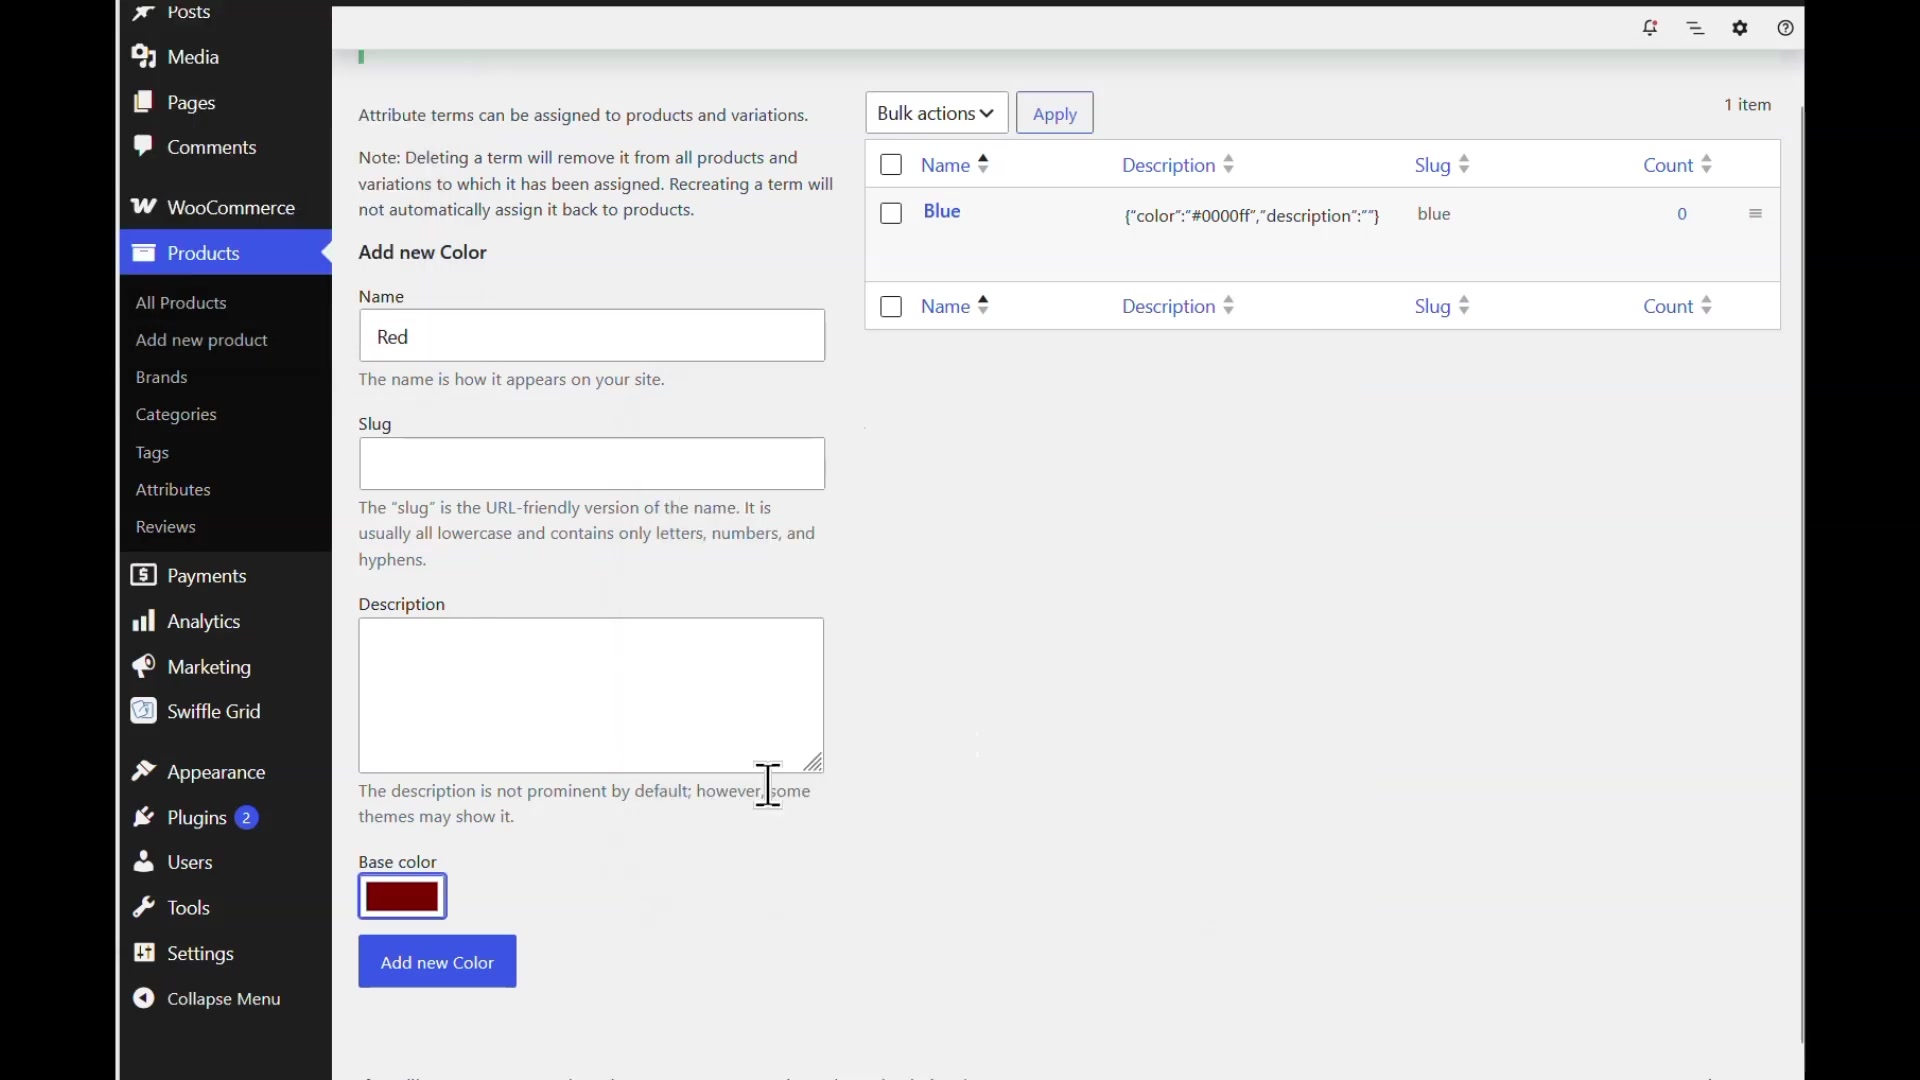
« Blue » is saved; « Red » is being created.
Step 4 — Assign colors to your variations
On your product page, in « Variable product » mode, assign each color to its variations. Every color/size combination becomes its own product variation.
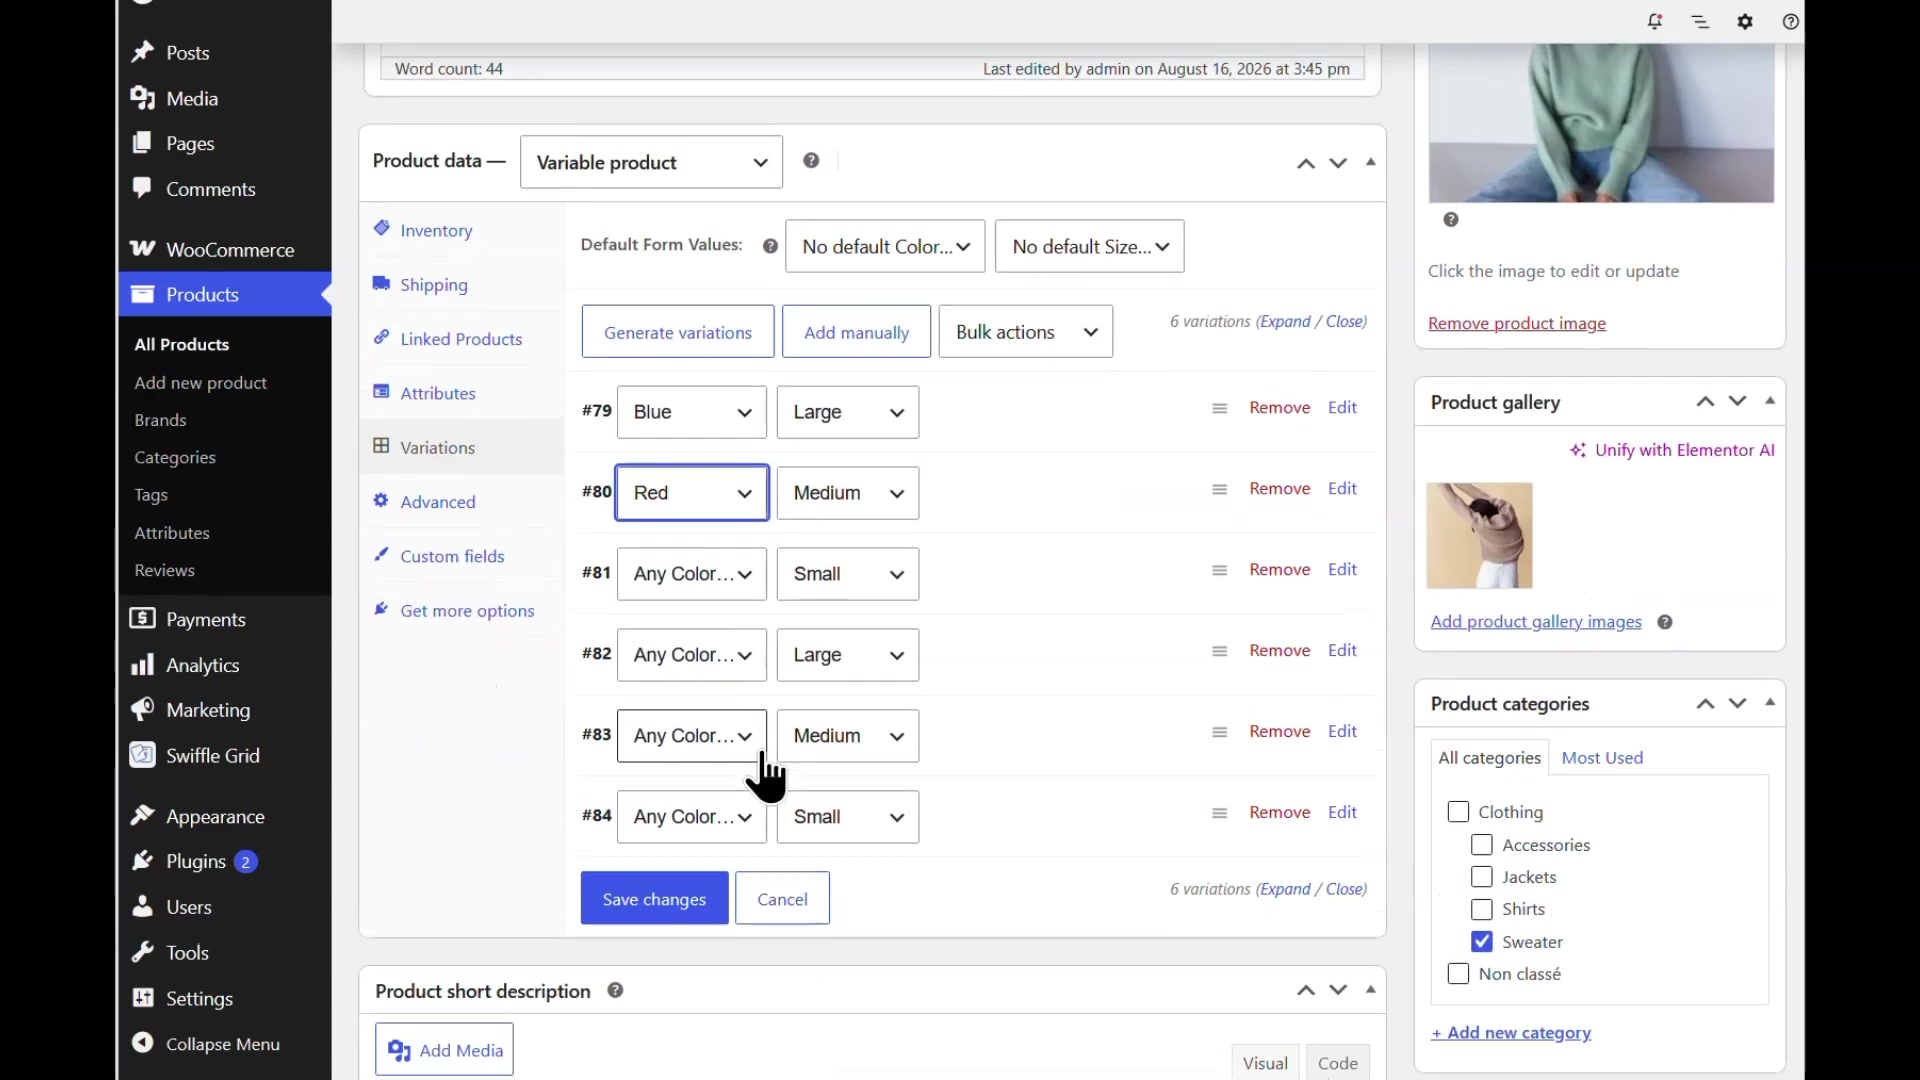
Product variations with « Blue » and « Red » assigned.
Result
Your store now shows beautiful color swatches, clickable right on the product card — a small detail that makes a real difference in the shopping experience.

Clickable color swatches, shown live on the grid.
Thanks for reading. Check out our channel for more tutorials to help you succeed.