
Turn WordPress Posts into a Navigation Menu or Social Bar
Last updated: August 2026
This isn’t a menu plugin — it’s regular WordPress posts. Give each post a title (the label), a featured image (the icon), and a custom field named NAV_URL (the destination). Put them all in one category, filter a Swiffle Grid block by that category, set the click action to Navigate URL, and you’ve got a fully styled menu — round the images, size them, center them, or let them scroll. Swap the category for your social profiles and the exact same setup becomes a social bar.
Step 1 — Create a category and enable Custom Fields
Start by creating a post category dedicated to this menu or social bar (for example « Main Menu » or « Social Links »). Custom fields aren’t shown by default in the block editor, so before creating your items, open any post, click the three-dot Options menu in the top right, open Preferences, and switch on Custom fields under Advanced. WordPress reloads the editor once you confirm.
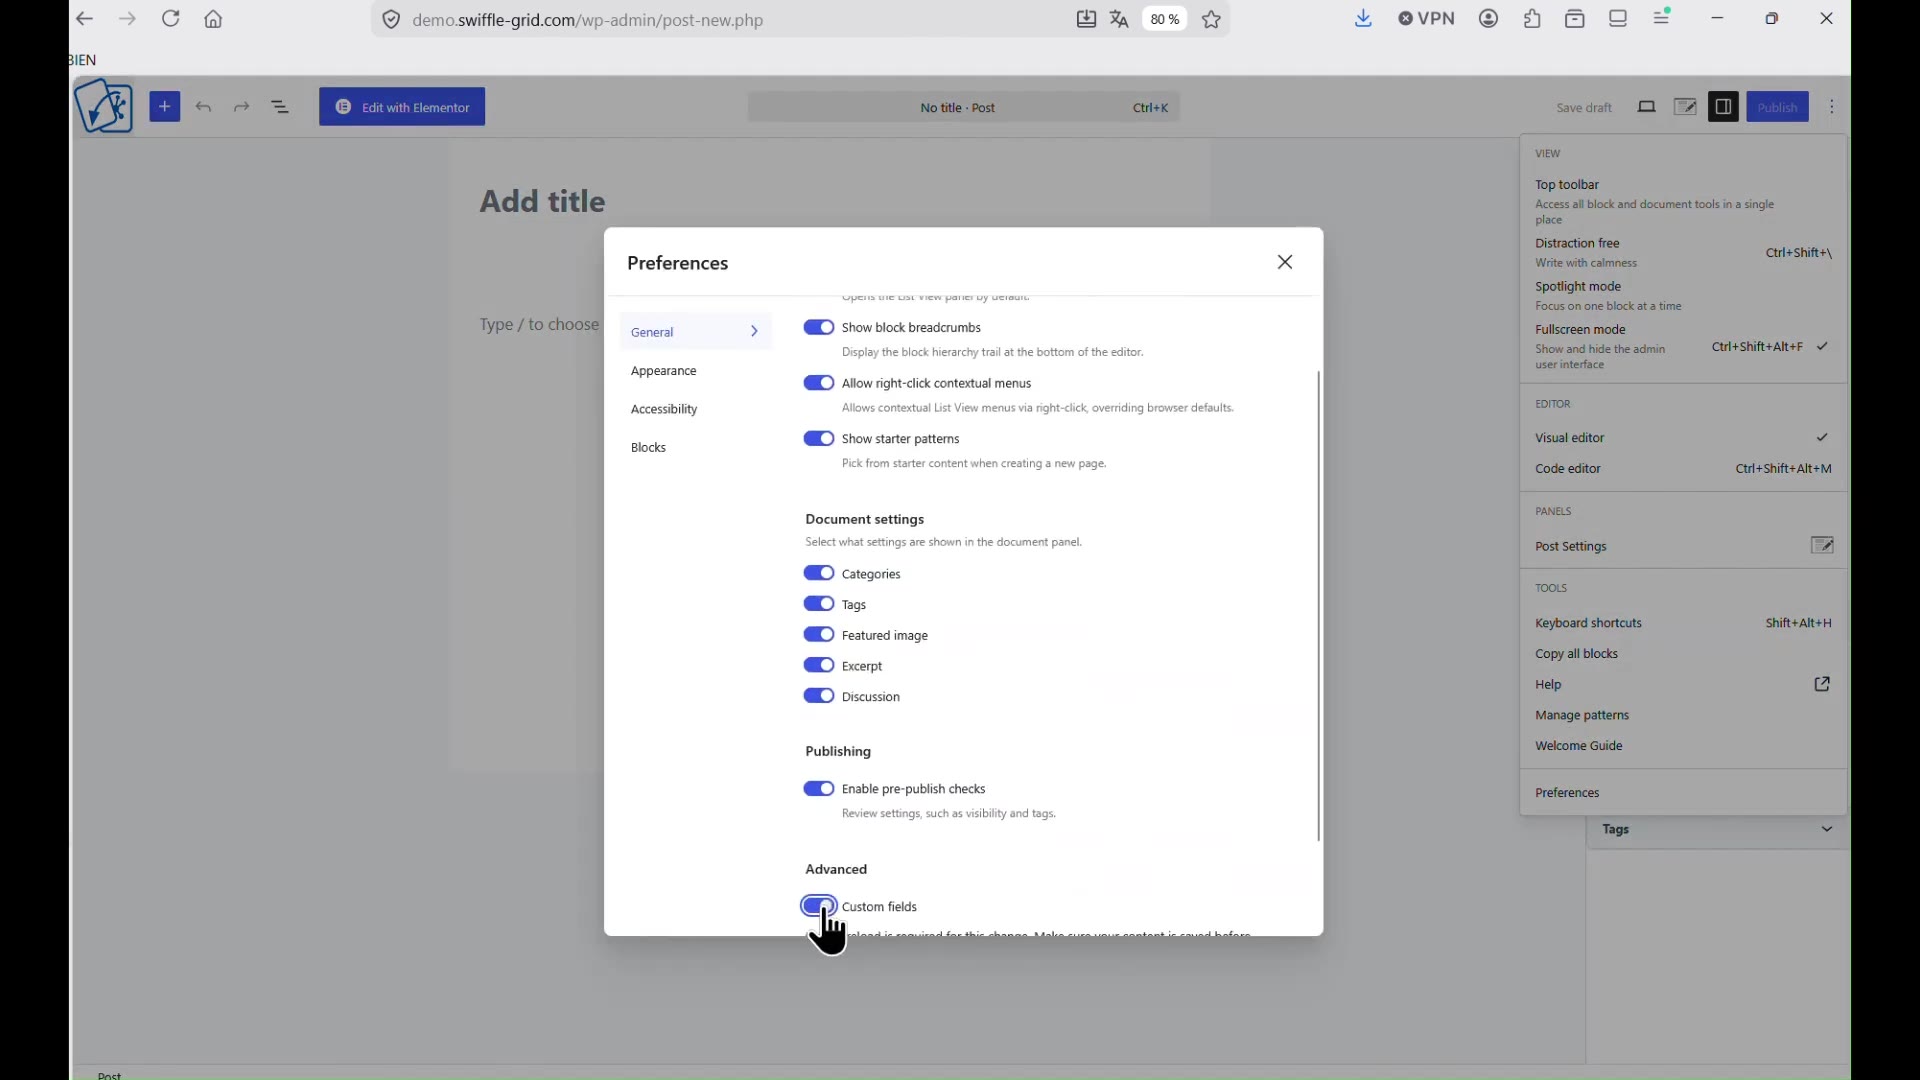
Preferences → Advanced → Custom fields.
Step 2 — Create one post per menu item
For each entry in your menu (or each social profile), create a new post: the title becomes the label, the featured image becomes the icon, and the destination link goes in a custom field named exactly NAV_URL. Assign the post to the category you created in Step 1. Repeat for every item.
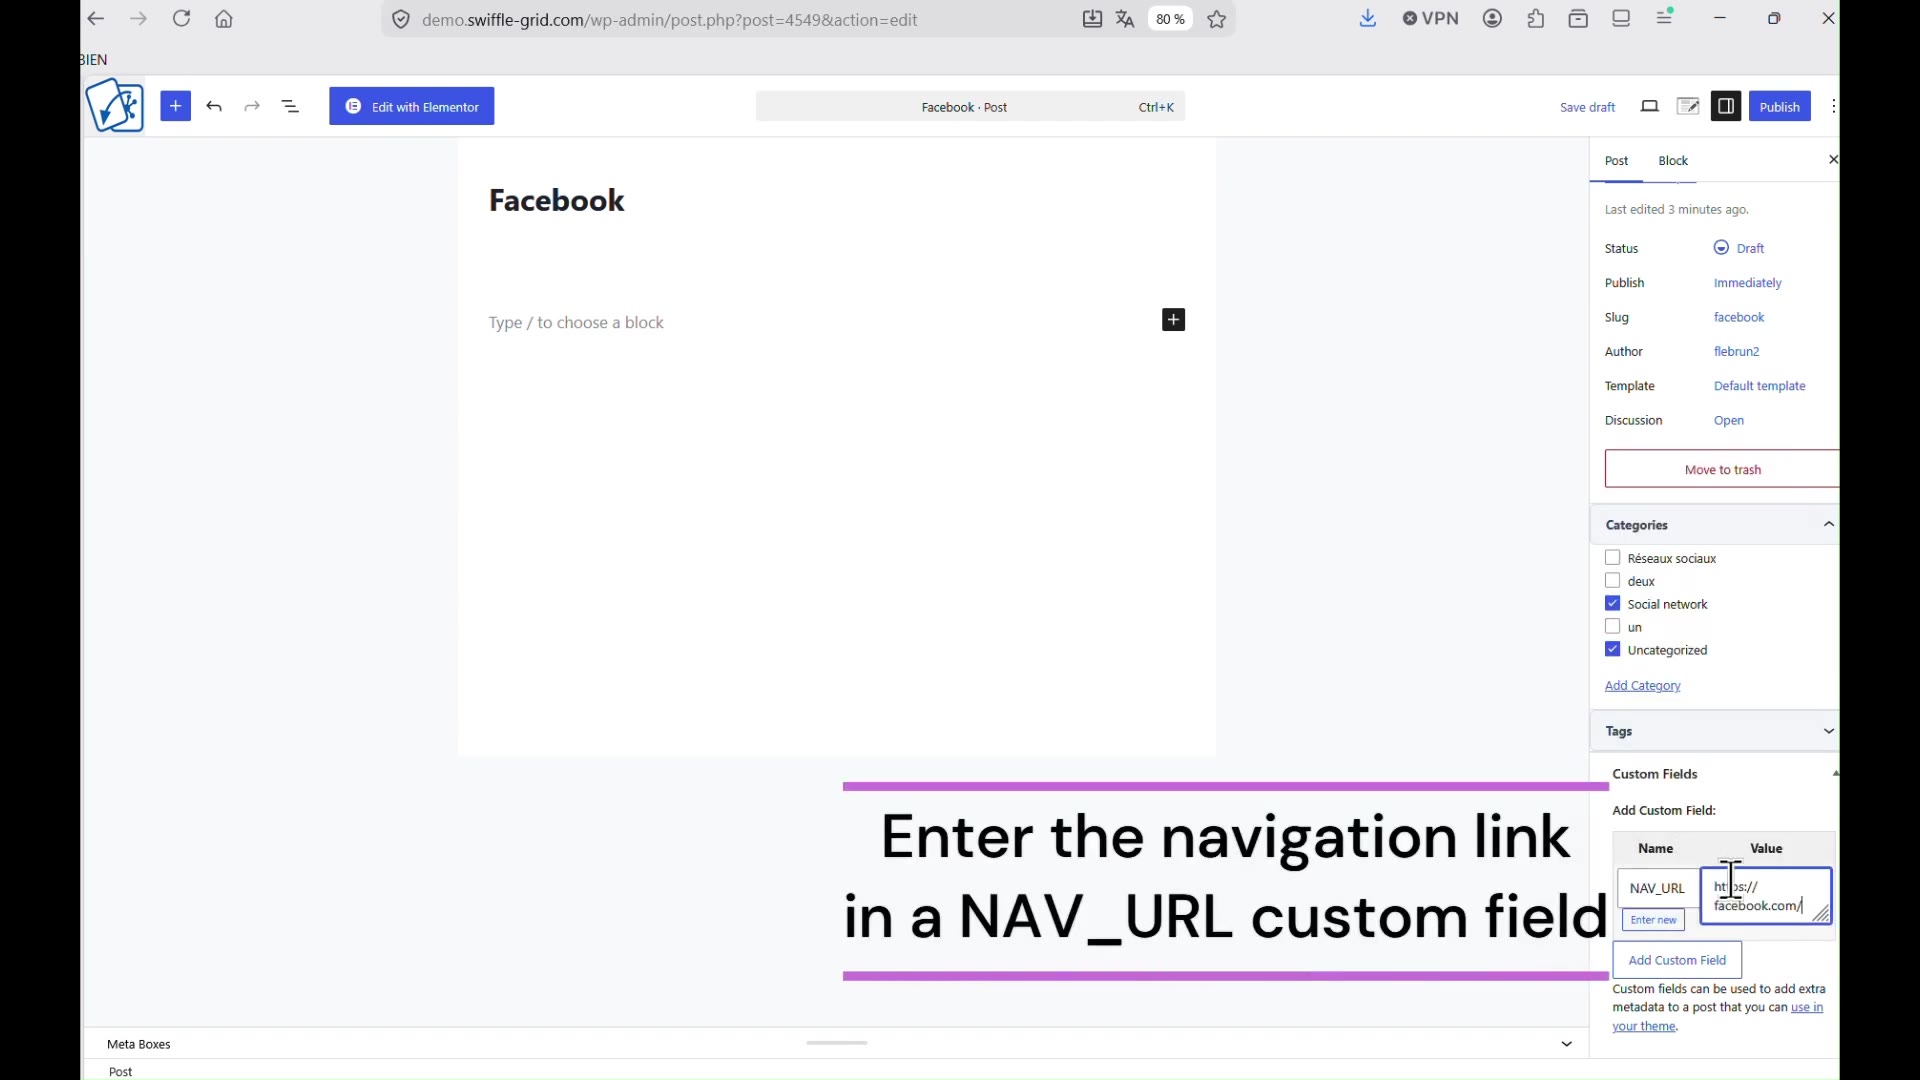
One custom field, always named NAV_URL, holding the link for that item.
Step 3 — Add a Swiffle Grid block and filter by category
On the page where you want the menu to appear (Gutenberg or Elementor both work the same way), add a Swiffle Grid block and filter it to your dedicated category. Adjust card size, spacing, and layout however you like — this is what turns a plain list of posts into a styled bar.
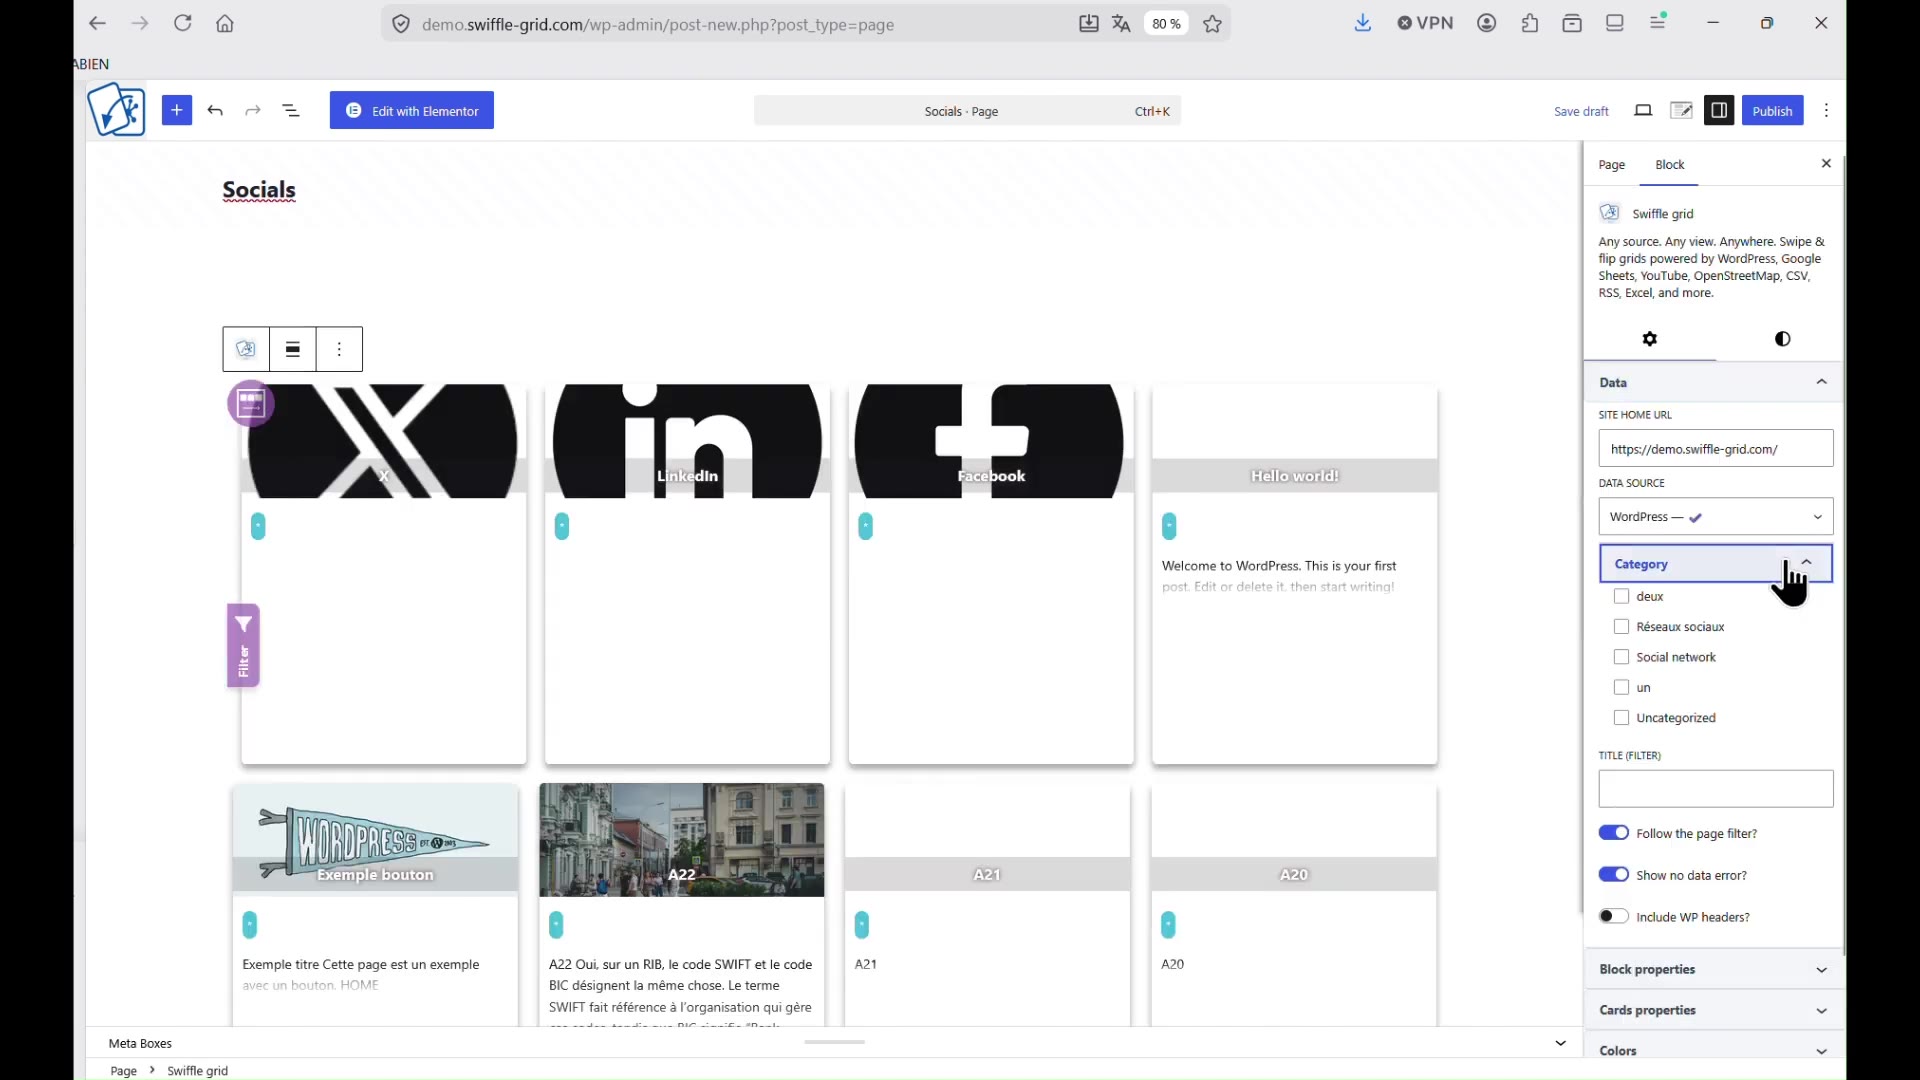
Filtering the block to the category holding your menu items.
Step 4 — Set the click action to Navigate URL
In the block’s Actions settings, set Card front click/tap action to Navigate URL. Clicking or tapping a card now opens whatever link is stored in that post’s NAV_URL field — that’s what makes it behave like a real menu.
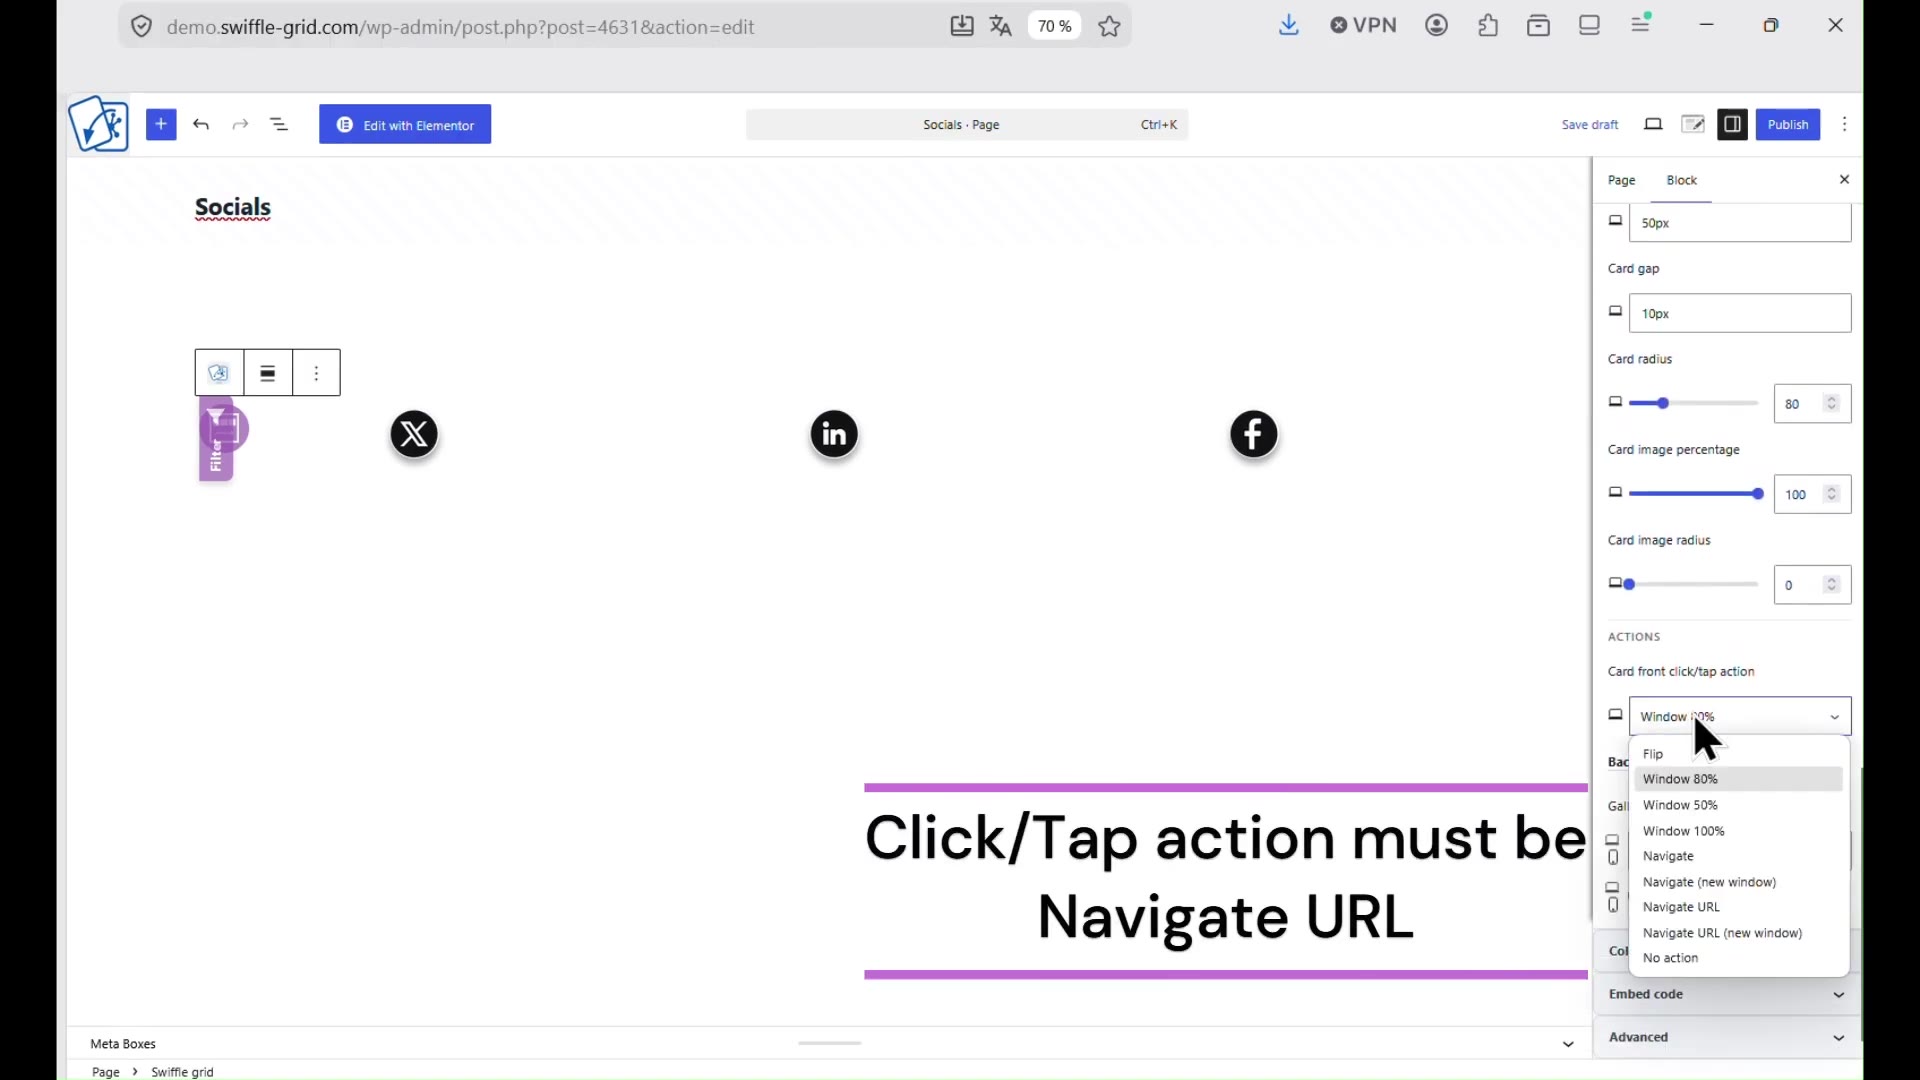
Navigate URL sends the click to the post’s NAV_URL field.
ℹ️ You can also copy the code from the block’s Embed code tab and place it on a non-WordPress page. Just remember to authorize the external URL under Swiffle Grid → URLs allowed to embed first. See the Admin Setup Reference for details.
Result
Your menu (or social bar) is now live wherever you placed the block — round the images, resize them, center them, or let the row scroll to fit your design. Want a second bar for something else? Create another category, repeat the same four steps, and add a second Swiffle Grid block filtered to it — no menu plugin required either way.
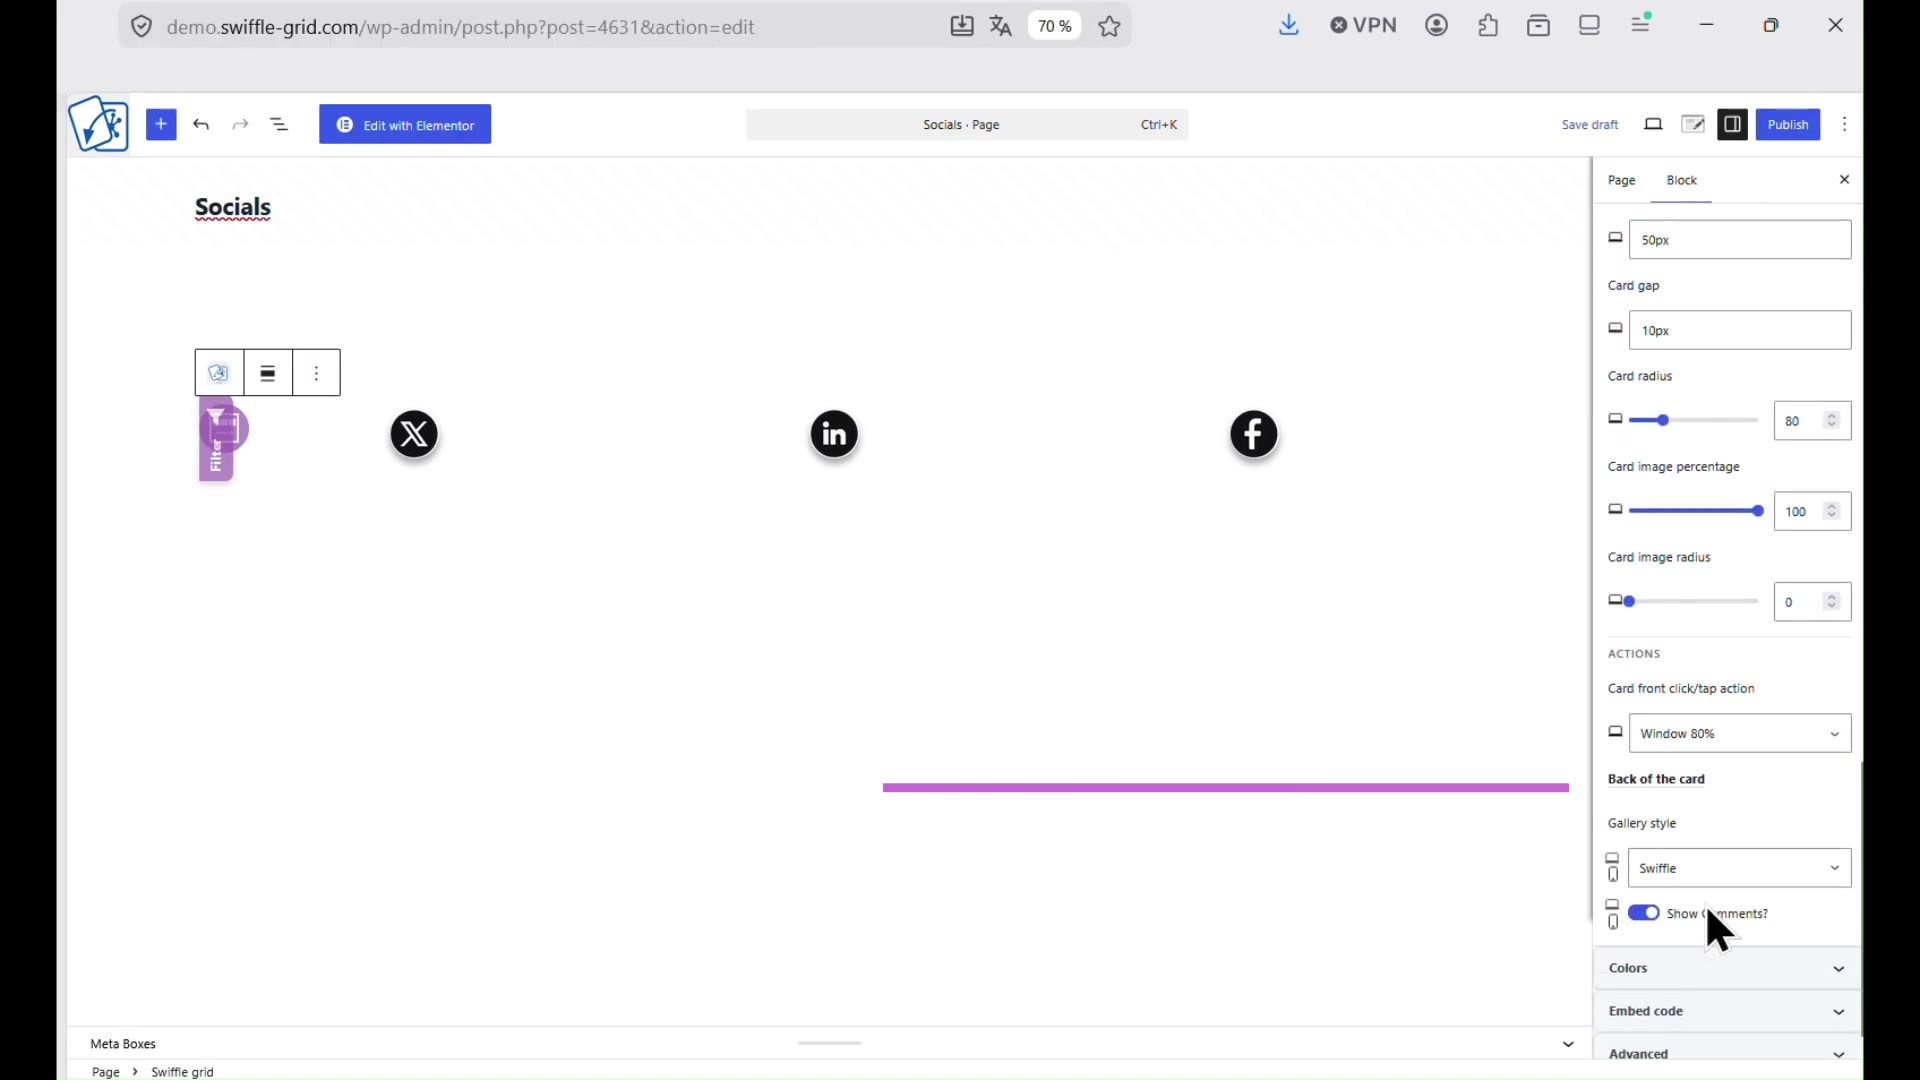
The finished bar — regular WordPress posts, styled as clickable icons.