
How to Add Custom Options to Your WooCommerce Products
Last updated: August 2026
This walks through the video above step by step. The result: extra, flexible choices for your customers — right on the product page, no code required.
Step 1 — Open the Custom Fields tab
On your product page, open the Custom Fields tab in the Product data panel, then click Add a Field.
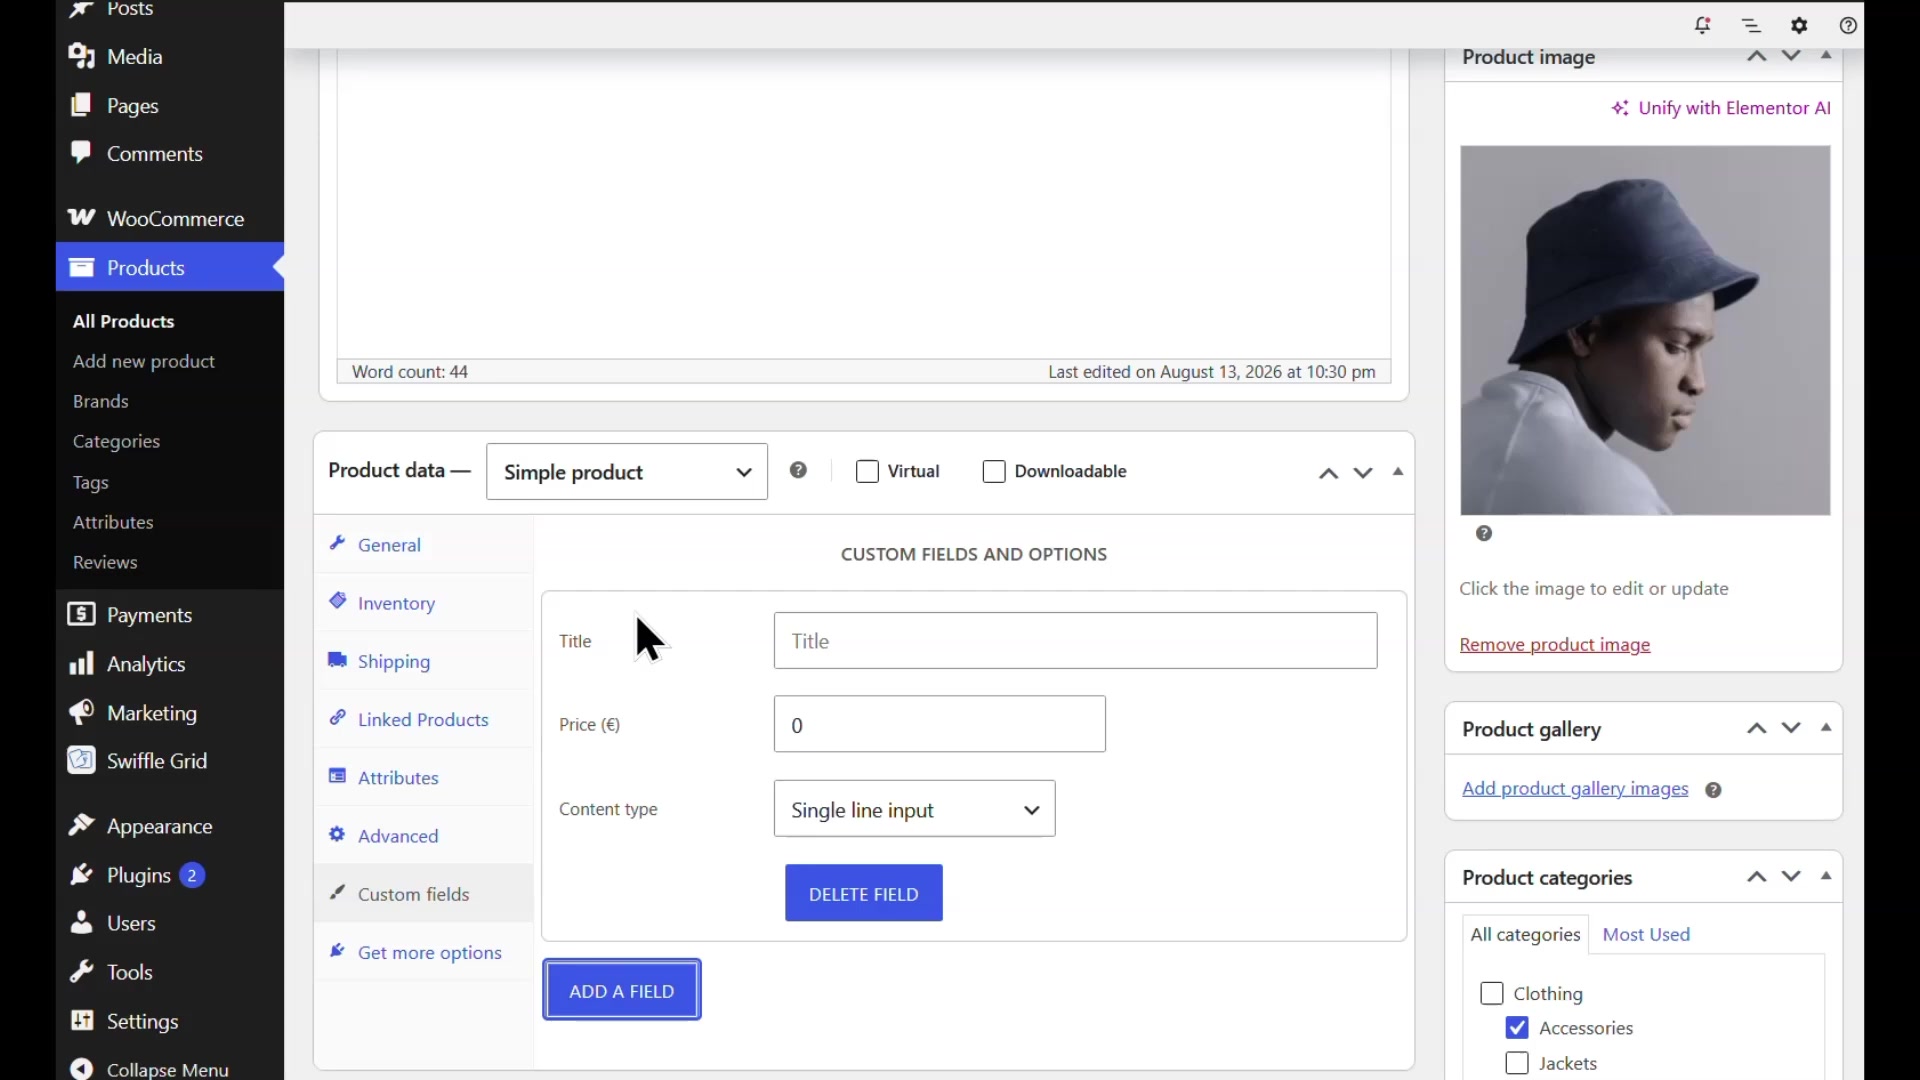
The Custom Fields and Options panel, ready for a new field.
Step 2 — Choose the option type
In the Content type field, select the type of option you want to offer — a single line input, an accept/reject option, a choice from a list, a number, a date, and more.
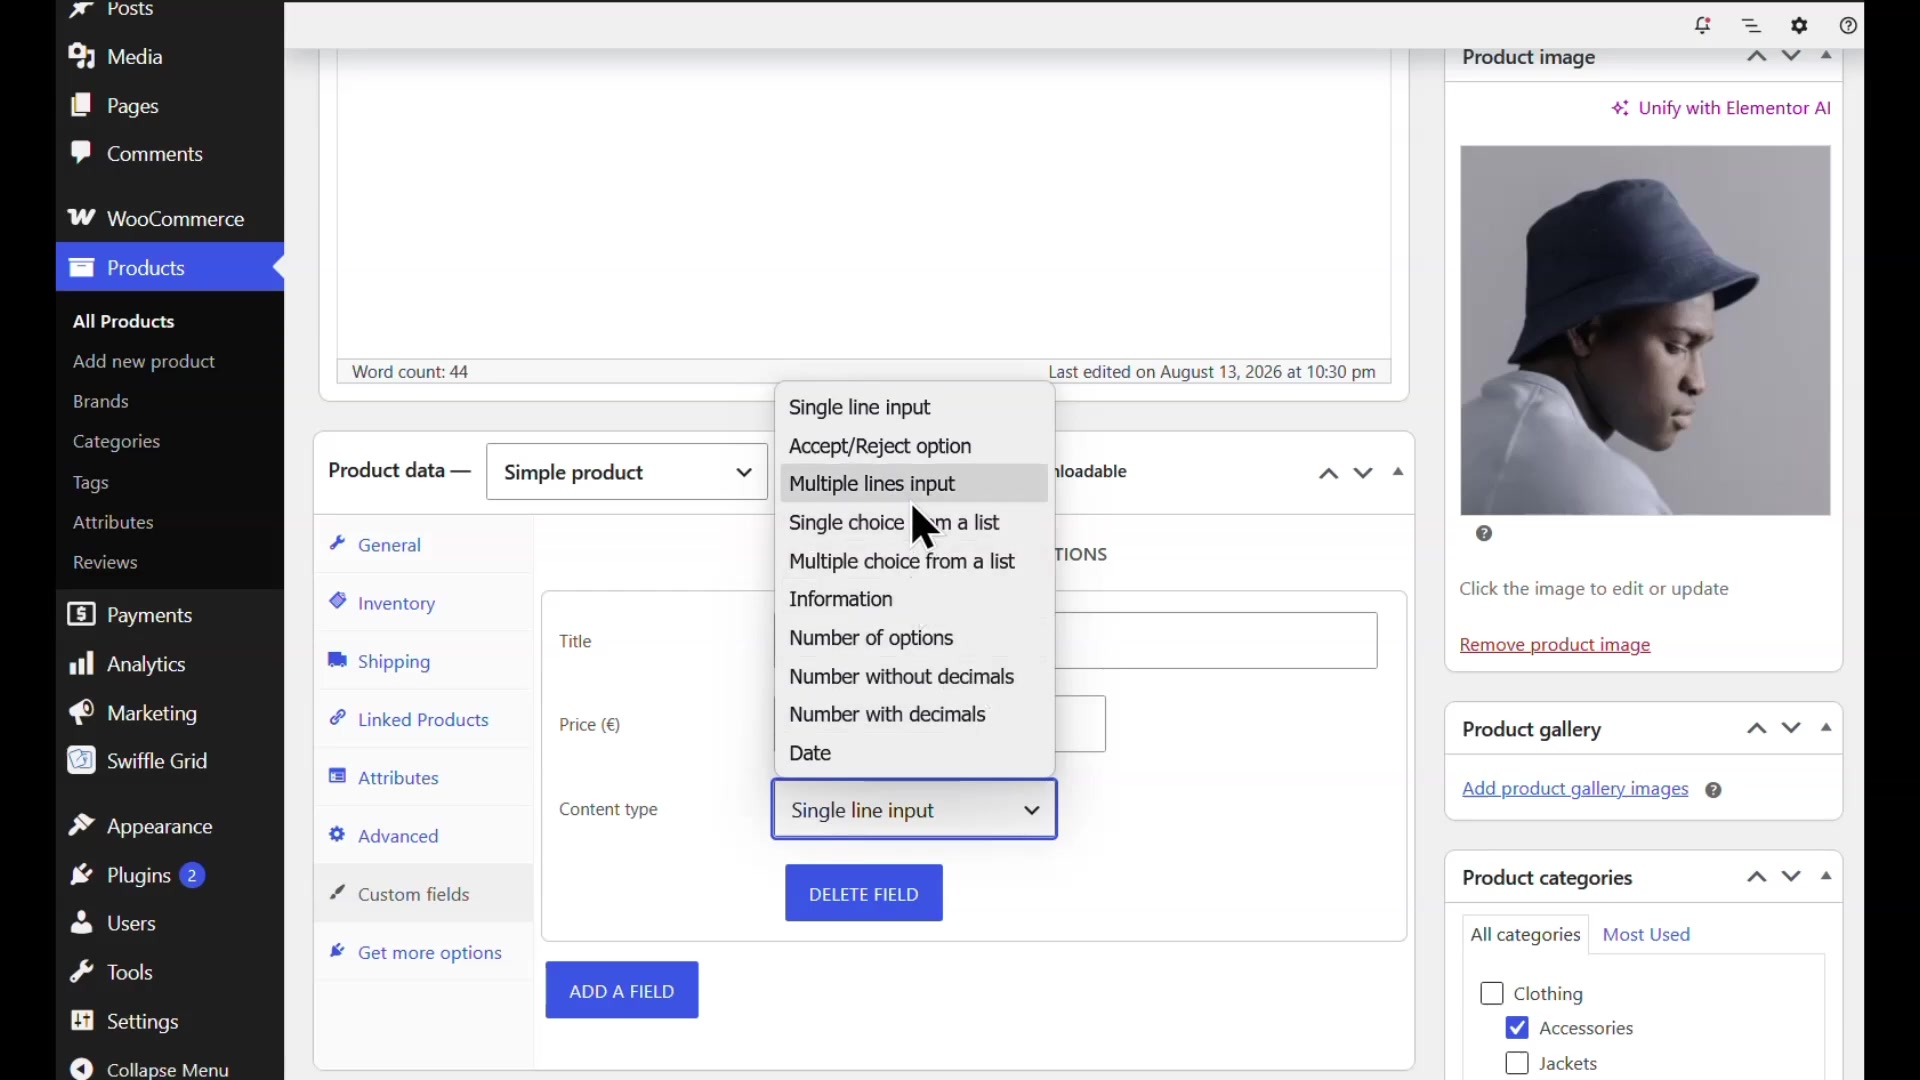
The full list of available option types.
ℹ️ Pick the type that matches how customers should answer — a checkbox for a simple yes/no add-on, a list for several named choices, a number field for a quantity-based extra.
Step 3 — Name it and set a price
Give your option a name. If it’s a paid option, type in its price — it will be added on top of the base product price whenever a customer selects it.
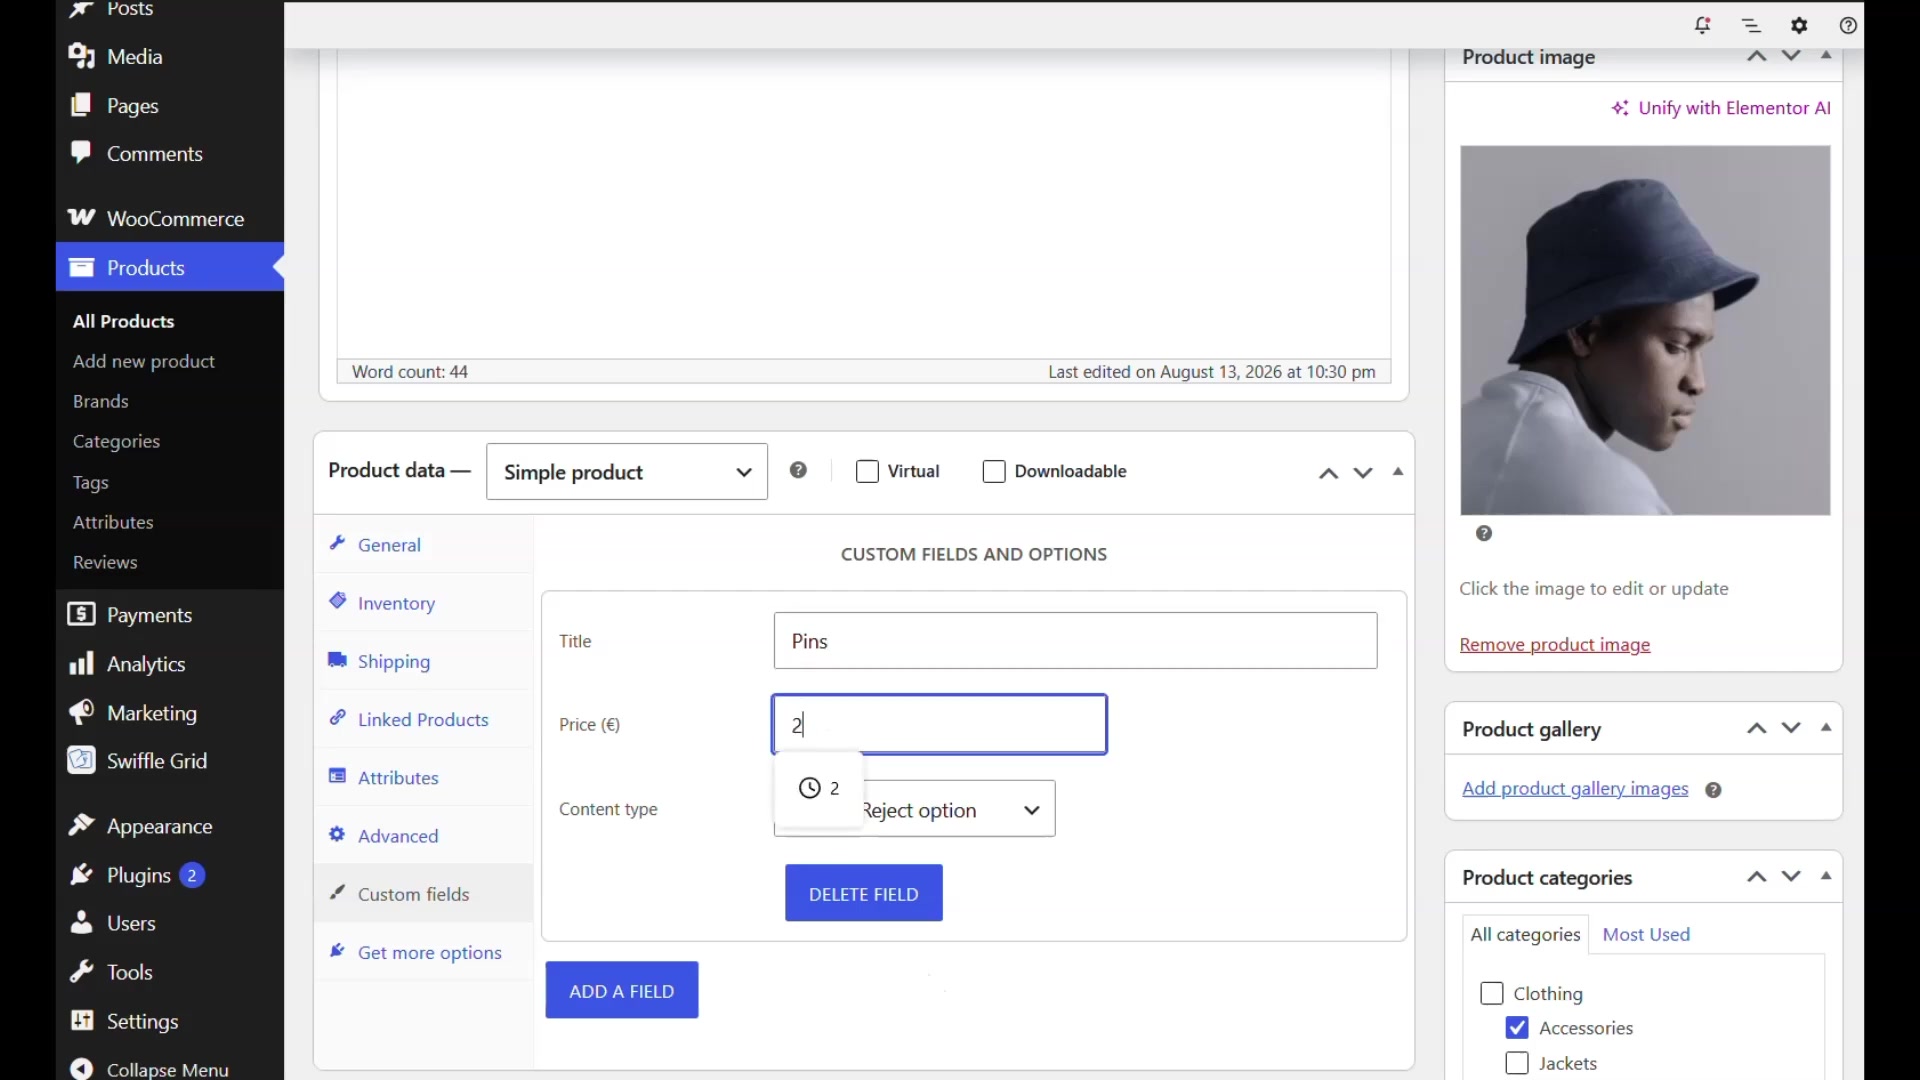
Naming the option « Pins » and setting its price.
Result
Save your changes — that’s it. Your product now offers the option right on its page, and its price is added automatically whenever a customer selects it.

The « Pins » option, live on the product page.
Thanks for reading. Check out our channel for more tutorials to help you succeed.